Wood painting projects require precision and attention to detail to achieve a flawless, professional finish. One crucial step in the process is sanding between paint coats, which helps to smooth out imperfections, ensure proper adhesion, and ultimately enhance the durability and aesthetic appeal of the final result. By sanding between paint coats, you can achieve a smooth and even surface that is ready to receive the next layer of paint, resulting in a high-quality finish that will stand the test of time. In this guide, we will walk you through the step-by-step process of properly sanding and cleaning up dust to achieve a professional finish on your wood projects.
Key Takeaways:
- Sanding between paint coats helps create a smooth and even surface for the next coat of paint to adhere to.
- The purpose of sanding is to remove imperfections, bumps, drips, and drips on the painted surface.
- Sanding also helps to improve adhesion and durability of the paint job.
- To properly sand between paint coats: Start with a fine-grit sandpaper, sand in a circular motion, clean the surface thoroughly, and apply the next coat of paint.
- Cleaning up dust is important to prevent it from interfering with the next coat of paint. Use a tack cloth or vacuum to remove dust particles.
Types of Sandpaper and Tools
Assuming you are preparing to sand between paint coats on wood, it is crucial to understand the various types of sandpaper and tools available. Selecting the right grit and tool will greatly impact the quality of your final finish. After all, the correct equipment can make the job much smoother and efficient.
Selecting the Right Grit for Your Project
One key aspect to consider when choosing sandpaper is the grit level. Different projects and surfaces require specific grit levels to achieve the desired result. A finer grit sandpaper, such as 220-400, is ideal for smoothing surfaces between coats of paint, while a coarser grit, like 80-120, is better suited for removing old paint or rough surfaces.
Comparing Sanding Tools: Manual vs. Electric
An important factor to consider when sanding wood is whether to use manual or electric sanding tools. Manual sanding tools, such as sanding blocks, offer more control and precision for small areas or intricate designs, while electric sanders, like orbital sanders, are efficient for larger surfaces and reduce hand fatigue. Both tools have their advantages, so choosing the right one depends on the specific requirements of your project.
Step-by-Step Guide to Sanding Between Paint Coats
Some experts recommend sanding between paint coats to achieve a smooth, professional finish. The process involves sanding the surface lightly before applying the next layer of paint to remove imperfections and create a better adhesion. Below is a step-by-step guide on how to properly sand between paint coats for your wooden surfaces.
| Preparing the Wood Surface | The Sanding Process: Technique and Pressure |
Preparing the Wood Surface
Any existing paint or finish should be removed using a stripping agent or sandpaper. Once the surface is clean, smooth, and dry, you can begin the sanding process. Make sure to remove any dust or debris to ensure a clean working environment.
The Sanding Process: Technique and Pressure
Preparing the wood surface for paint involves using fine-grit sandpaper (around 220-grit) to lightly sand the surface, removing any bumps or imperfections. Use a back-and-forth motion with gentle pressure to avoid sanding too deeply into the wood. Make sure to sand evenly across the entire surface to achieve a uniform finish.
Tips for a Flawless Finish
To achieve a professional finish when painting wood, it is crucial to sand between paint coats. This process helps to create a smooth surface, remove imperfections, and ensure better adhesion for subsequent coats. Proper sanding can make a significant difference to the end result, providing a flawless and long-lasting finish.
Factors Affecting Sanding Outcomes
Outcomes of sanding can vary based on several factors:
- Wood type: Different woods may require different sanding techniques.
- Previous preparation: Proper surface preparation before sanding is vital.
- Sanding grit: Using the correct grit for the wood and finish is crucial for a smooth result.
After sanding, ensure the surface is cleaned thoroughly to remove any dust particles that could affect the next coat of paint.
Understanding the Pros and Cons of Sanding Techniques
| Pros | Cons |
|---|---|
| Smooth finish | Potential for over-sanding |
| Better paint adhesion | Time-consuming process |
Tips: Sand in the direction of the wood grain to avoid unwanted marks. Plus, always wear a mask and eye protection when sanding to protect yourself from dust and debris.
Cleanup and Maintenance
Not sure about the importance of sanding between coats of paint? Check out Sanding Between Coats of Paint: Should You Do It?, to understand the benefits for achieving a professional finish on wooden surfaces.
Efficient Dust Removal Strategies
Efficient dust removal after sanding is crucial for a smooth final coat. Use a vacuum cleaner with a brush attachment to quickly and effectively remove dust from the surface. Consider dampening a cloth with water to wipe down the area and eliminate any remaining particles. This will ensure a clean base for the next coat of paint.
Preserving Your Tools for Future Projects
One of the key aspects of maintaining your tools for future projects is proper cleaning and storage. After each use, wipe down your sandpaper with a damp cloth to remove any built-up residue. Store sandpaper in a dry, cool place away from direct sunlight to prevent it from degrading. Investing in high-quality sandpaper and cleaning it properly will extend its lifespan and save you money in the long run.
Strategies: Regularly inspect your sandpaper for signs of wear and tear, and replace it when necessary to ensure optimal performance during your painting projects.
Summing up
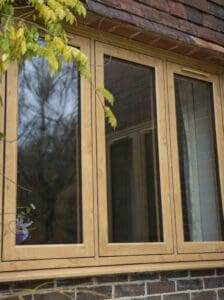
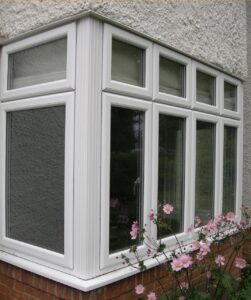
Properly sanding between paint coats is imperative to achieving a professional finish on wood. It smooths out imperfections, helps the paint adhere better, and ensures a flawless final result. By following the step-by-step instructions for sanding and cleaning up dust effectively, you can create a smooth and sleek surface that enhances the overall appearance of your wooden windows and doors. Keep in mind, the key to a professional finish lies in the meticulous preparation and attention to detail when it comes to sanding and painting.
FAQ
Q: Why is it important to sand between paint coats on wood?
A: Sanding between paint coats on wood helps to create a smooth and even surface, removes imperfections, and promotes better adhesion for the next coat of paint.
Q: What difference does sanding between paint coats make to the end result?
A: Sanding between paint coats ensures a professional finish by eliminating rough spots, improving paint adherence, and achieving a smoother final surface.
Q: How do you properly sand between paint coats on wood?
A: Use fine-grit sandpaper (such as 220-grit) and sand in a circular motion to gently scuff the surface. Wipe away dust with a tack cloth before applying the next coat of paint.
Q: How to clean up dust after sanding between paint coats?
A: Use a vacuum with a brush attachment to remove loose dust, followed by wiping the surface with a damp cloth to eliminate any remaining particles.
Q: Why choose Express Windows Group for wooden window and door services?
A: Express Windows Group provides professional services for wooden windows and doors, including expert sanding and painting techniques to ensure a high-quality finish for your home.